How to Integrate ChatGPT API in Flutter
This tutorial provides a step-by-step guide on how to integrate OpenAI’s ChatGPT API into a Flutter application. We will start with setting up a Flutter project, then we will integrate the ChatGPT API.
Setting Up Your Flutter Project
Start by creating a new Flutter project:
flutter create chat_gpt_app
Move into your new project’s directory:
cd chat_gpt_app
Adding Dependencies
We will be using http for making HTTP requests to the ChatGPT API and dotenv for handling environment variables (such as the OpenAI API key). Add this to your project by heading to pubspec.yaml and running flutter pub get :
dependencies:
  flutter:
    sdk: flutter
  http: 1.2.2
  flutter_dotenv: 5.2.1
Setting Up Environment Variables
Create a .env file in the root directory of your project and add your OpenAI API key:
OPENAI_KEY=your_api_key_here
Next, go to pubspec.yaml add add the line
  assets:
    - .env
Make sure you load the environment variables at the start of your application. Modify the main.dart file to include:
import 'package:flutter_dotenv/flutter_dotenv.dart' as dotenv;

void main() async {
  await dotenv.load();
  runApp(MyApp());
}
Creating the ChatGPT API Service
Create a new file named chat_gpt_service.dart in your lib directory, and write the following code:
import 'dart:convert';
import 'package:http/http.dart' as http;
import 'package:flutter_dotenv/flutter_dotenv.dart';

class ChatGPTService {
  final String _apiUrl = 'https://api.openai.com/v1/chat/completions';
  final String _apiKey = dotenv.env['OPENAI_KEY']!;

  Future<String> getResponse(String message) async {
    final response = await http.post(
      Uri.parse(_apiUrl),
      headers: {
        'Content-Type': 'application/json',
        'Authorization': 'Bearer $_apiKey',
      },
      body: jsonEncode({
        'model': 'gpt-4o-mini',
        'messages': [
          {'role': 'system', 'content': 'You are a helpful assistant.'},
          {'role': 'user', 'content': message}
        ],
        'max_tokens': 60
      }),
    );

    if (response.statusCode == 200) {
      return jsonDecode(response.body)['choices'][0]['message']['content'];
    } else {
      print('Error: ${response.statusCode}, ${response.body}');
      throw Exception('Failed to load response');
    }
  }
}
Building the Chat Interface
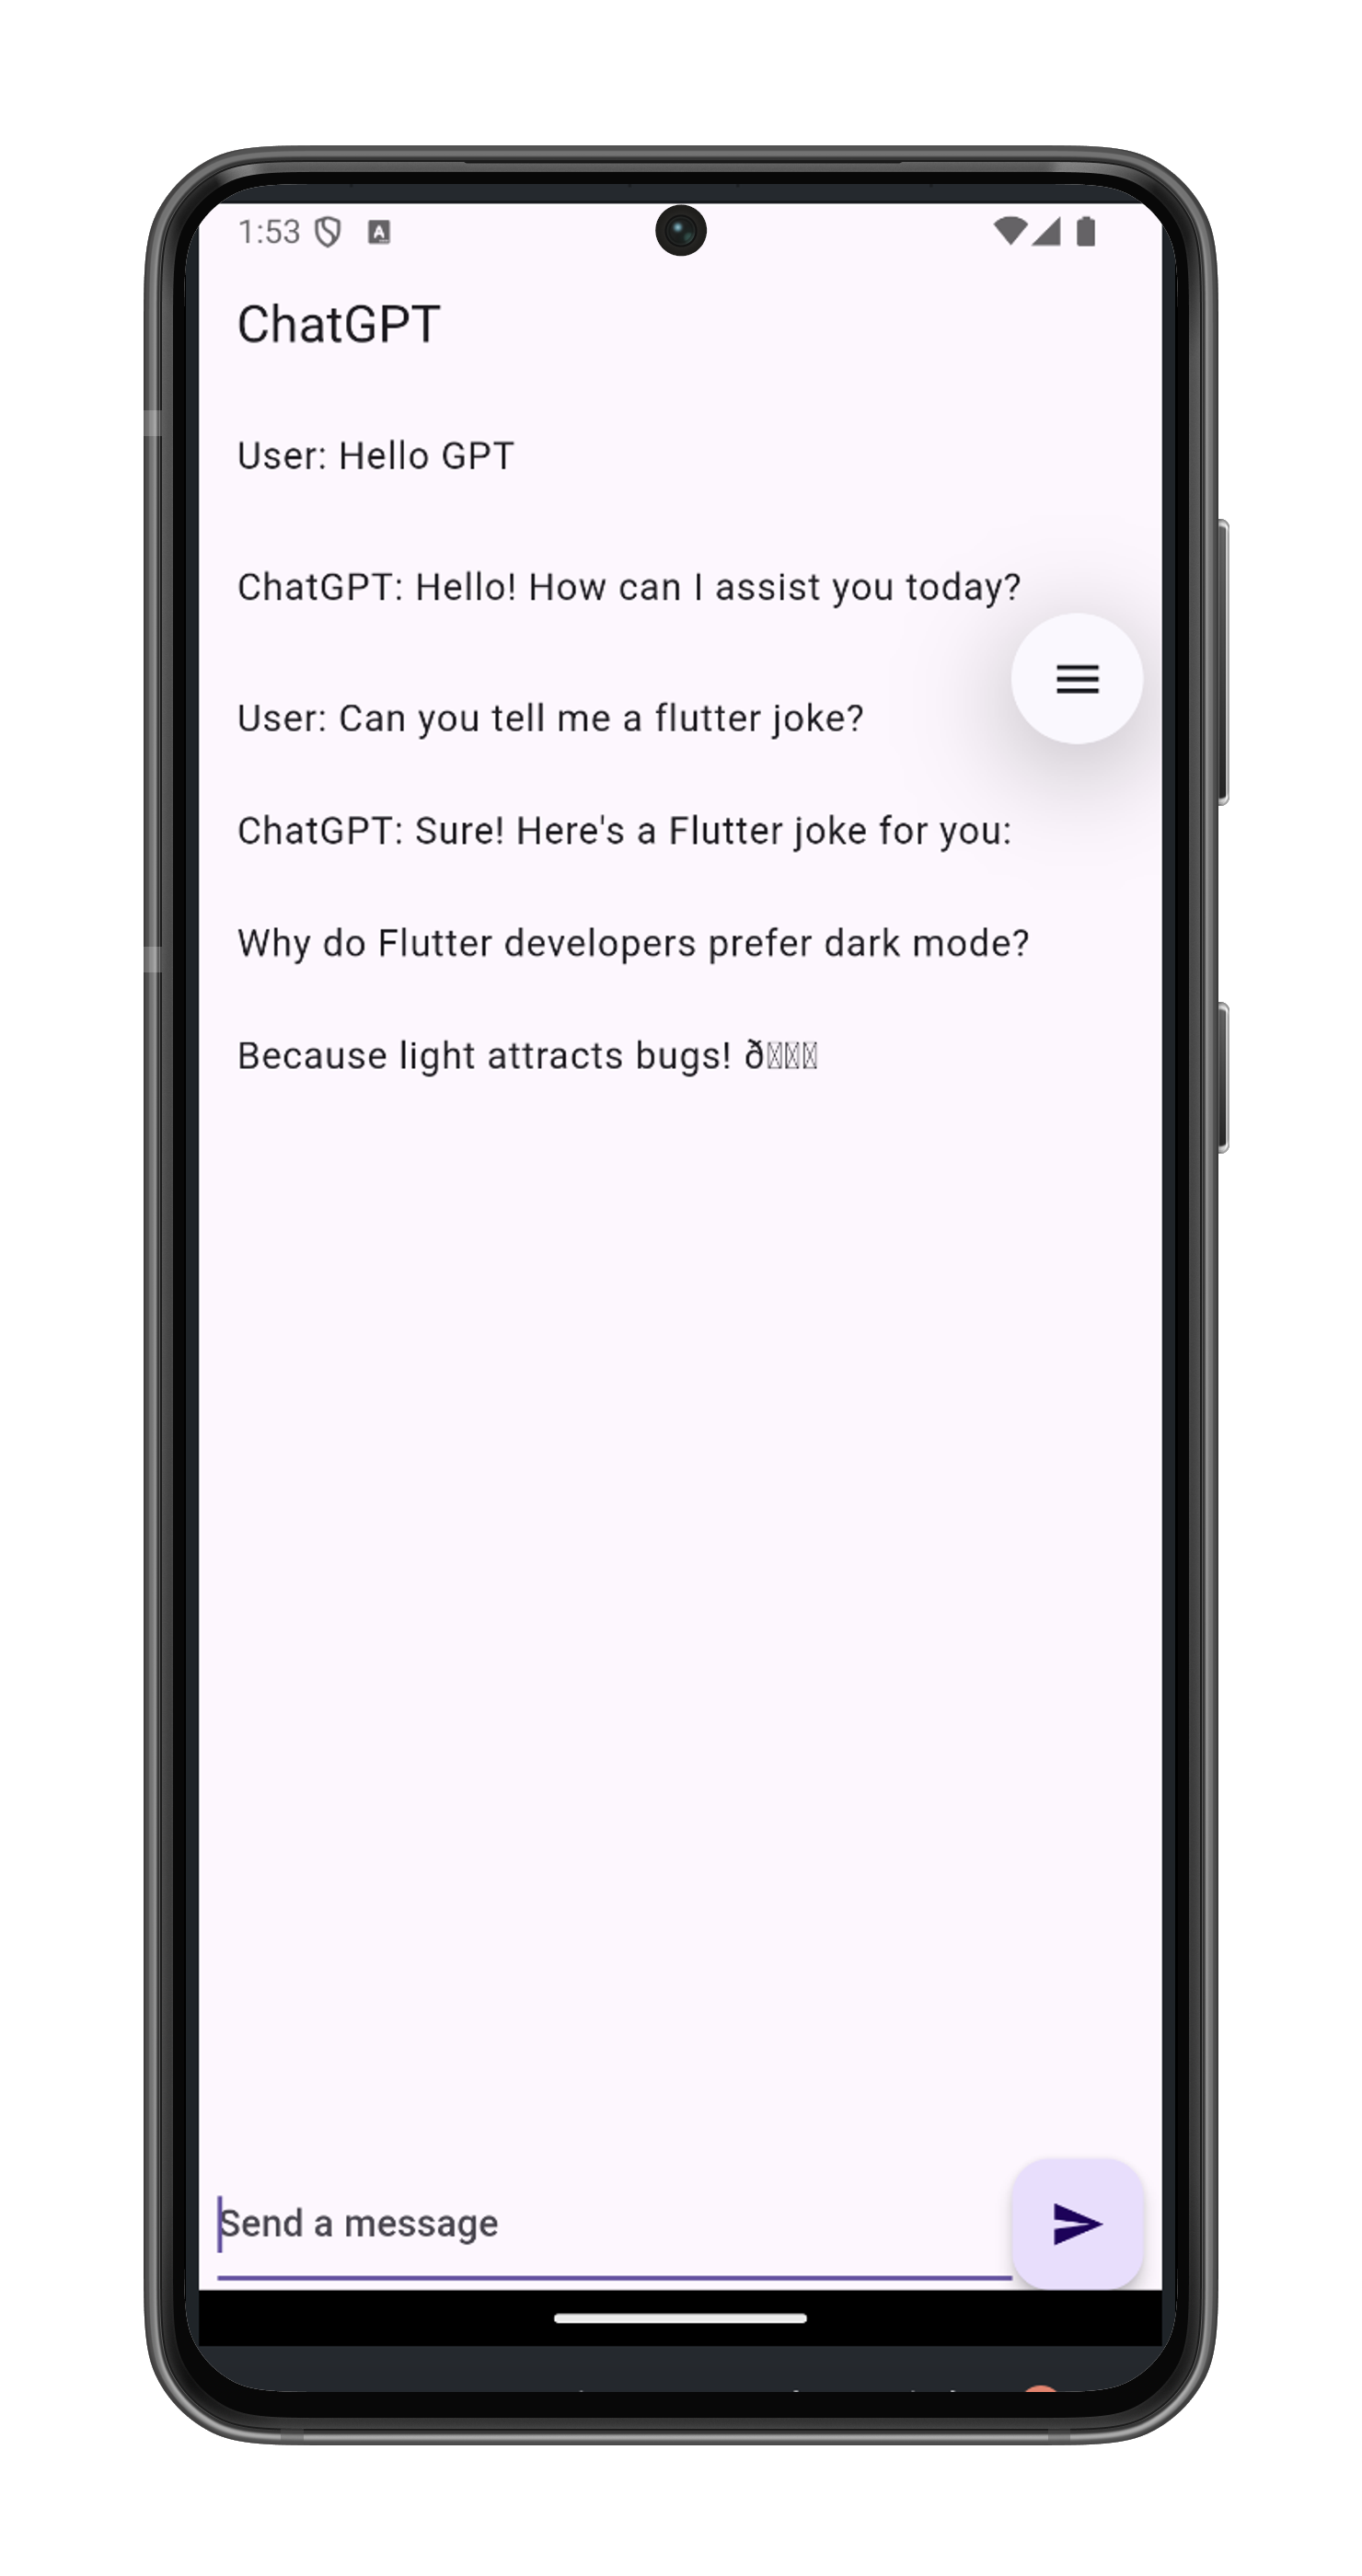
This tutorial doesn’t focus on creating a sophisticated UI, so for brevity, we’ll create a simple chat interface with a TextField for user input and a FloatingActionButton for sending messages.
In your main.dart file, replace the existing code with:
import 'package:flutter/material.dart';
import 'package:flutter_dotenv/flutter_dotenv.dart';
import 'chat_gpt_service.dart';
void main() async {
await dotenv.load(fileName: '.env');
runApp(const MyApp());
}
class MyApp extends StatelessWidget {
const MyApp({super.key});
Widget build(BuildContext context) {
return const MaterialApp(
debugShowCheckedModeBanner: false,
home: ChatScreen(),
);
}
}
class ChatScreen extends StatefulWidget {
const ChatScreen({super.key});
_ChatScreenState createState() => _ChatScreenState();
}
class _ChatScreenState extends State<ChatScreen> {
final List<String> _messages = [];
final TextEditingController _textController = TextEditingController();
void _handleSubmitted(String text) async {
// Logic to send message will go here
}
Widget build(BuildContext context) {
return Scaffold(
appBar: AppBar(title: const Text('ChatGPT')),
body: Column(
children: [
Expanded(
child: ListView.builder(
itemCount: _messages.length,
itemBuilder: (context, index) => ListTile(title: Text(_messages[index])),
),
),
Container(
margin: const EdgeInsets.symmetric(horizontal: 8.0),
child: Row(
children: [
Expanded(
child: TextField(
controller: _textController,
decoration: const InputDecoration(hintText: 'Send a message'),
),
),
FloatingActionButton(
onPressed: () => _handleSubmitted(_textController.text),
child: const Icon(Icons.send),
),
],
),
),
],
),
);
}
}
Connecting the Interface to the ChatGPT Service
Finally, we need to connect our chat interface with the ChatGPT service. Modify the _handleSubmitted function in the ChatScreen widget to:
import 'chat_gpt_service.dart';

// ...previous code

  void _handleSubmitted(String text) async {
    if (text.isEmpty) return;

    _textController.clear();
    setState(() {
      _messages.add('User: $text');
    });

    final String response = await ChatGPTService().getResponse(text);
    setState(() {
      _messages.add('ChatGPT: $response');
    });
  }
Finally, you should see your converation with Chat GPT.

Conclusion
That’s it! You now have a Flutter application integrated with the ChatGPT API. To start the app, run flutter run in your terminal.
Remember to keep your API key secure and do not expose it in a real-world application. It’s recommended to set up a backend server that communicates with the OpenAI API, and your Flutter app should communicate with this server.
If you are looking for the same integration, but in React Native, check out our company’s React Native ChatGPT app template.